Running WordPress using Always Free Resources in Oracle Cloud
MySQL HeatWave MySQL Oracle Cloud WordPress

Oracle Cloud Infrastructure (OCI) has a very robust always-free tier. Oracle recently announced that HeatWave MySQL will be part of that offering. This post will show how you can set up a free WordPress site using Always Free resources in Oracle Cloud.
Prerequisites
To follow along with this demo, you will need the following:
- An OCI account.
- If you do not have an account, create one here.
- MySQL Shell installed.
- You can download MySQL Shell here.
- You should have completed the steps to create Always Free Compute and HeatWave MySQL instances as outlined in this blog post.
Note the Public IP address of the Compute instance.
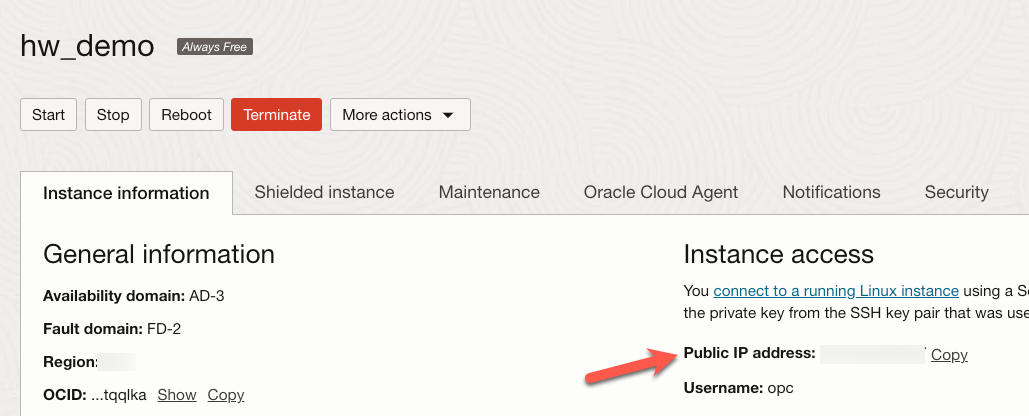
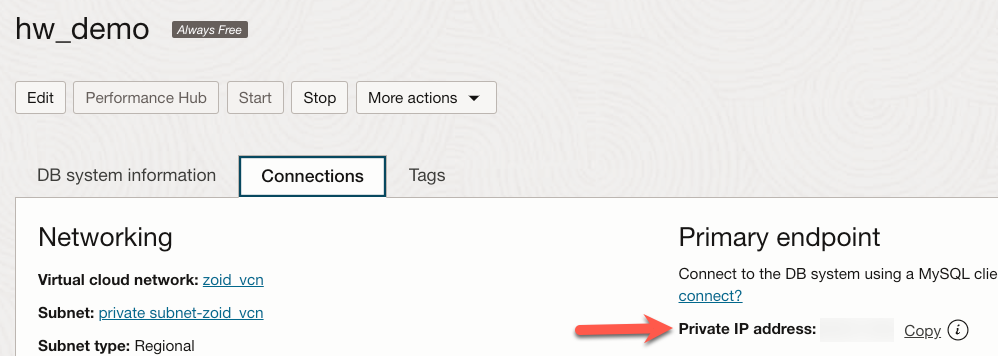
Lastly, we will also need the private IP address for the HeatWave MySQl instance.
Updates to VCN
Before we begin, we need to change the ingres rules in the public subnet of our Virtual Cloud Network (VCN) to allow web traffic into our Compute instance.
After logging in to OCI, click the ‘hamburger menu’ in the upper left corner.

In the search box that appears, type ‘vcn’ (1) and then click the ‘Virtual cloud networks’ link (2).

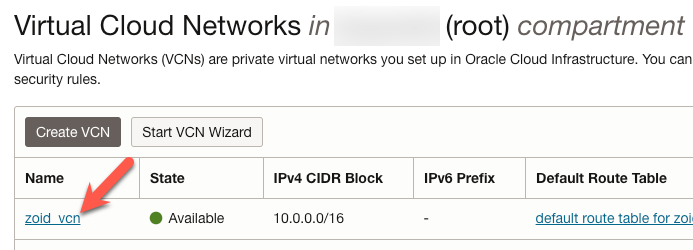
Click the link for the VCN we want to update. Here, I am using the zoid_vcn VCN.
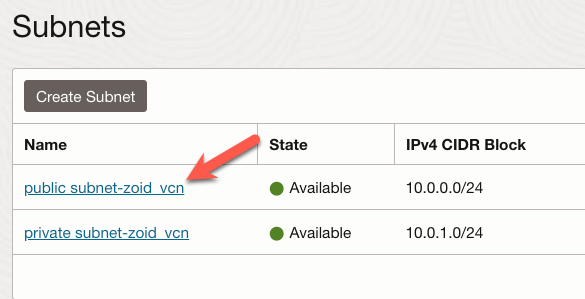
Once on the VCN Details page, scroll down to the list of subnets and click the ‘public’ subnet link. Here, I am using private_subnet-zoid_vcn.
On the Subnet Details page, scroll down to the ‘Security Lists’ section and click the link for the security list you want to update.
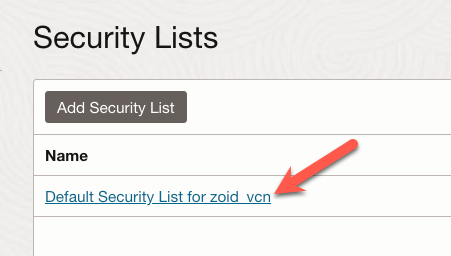
When we reach the Security List Details page, scroll down to the section labeled ‘Ingress Rules’ and click the Add Ingress Rules button.
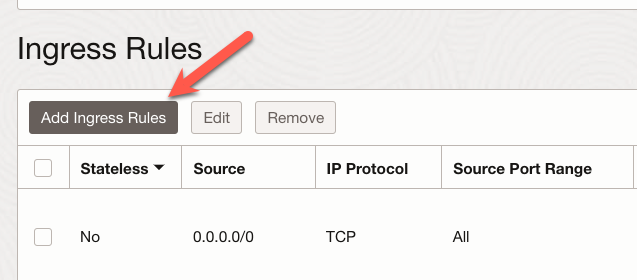
On the Add Ingress Rules form, specify the CIDR as 0.0.0.0/0 (1) - this CIDR will allow traffic from any IP address. Ensure the ‘IP Protocol’ is TCP (2) and specify ports 80 & 443 in the ‘Destination Port Range’ (3). You can add an optional comment (4). When you are done, click the ‘Add Ingress Rules’ button (5).
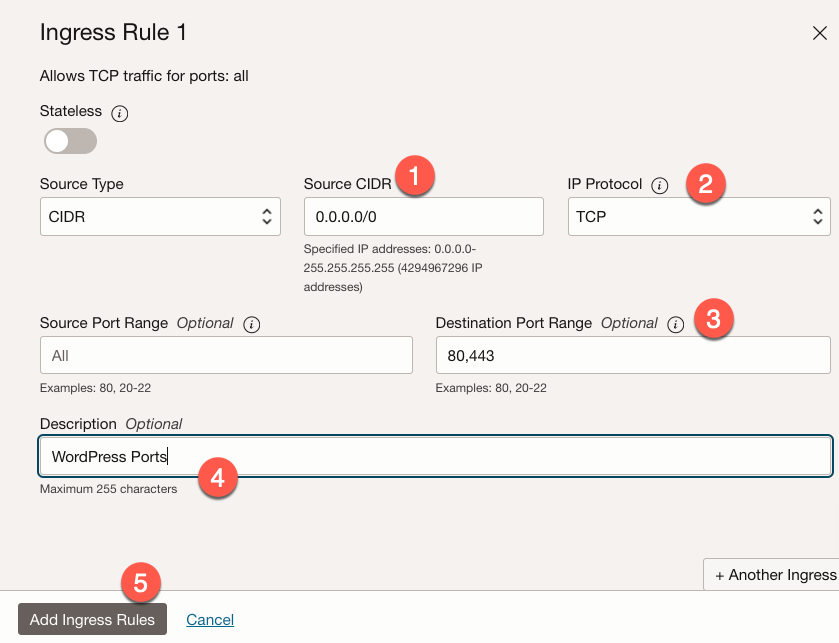
When the ingress rules have been added, they should be listed under the Ingress Rules section of the Security List details page.

Prepping the Database
We need to prep the HeatWave MySQL instance by adding the schema we will use for our WordPress site.
The command to connect to the HeatWave MySQL instance resembles:
mysqlsh --ssh opc@{host address} --ssh-identity-file {path to key} {db user}@{HeatWave MySQL IP address}:33060
Let’s break down the parts of this command.
--ssh- This option tells MySQL Shell we want to connect to a MySQL instance usingssh.opc@{host address}- The username and host address of the SSH server we wish to connect to.- The
{host address}is the public IP address of the compute instance we created.
- The
--ssh-identity-file {path to key}- This option tells MySQl Shell what private key to use.- If you generated a key pair,
{path to key}should be the full path to the downloaded private key.
- If you generated a key pair,
{db user}@{HeatWave MySQL IP address}:33060- The connection information for the HeatWave MySQL instance.{db user}- The admin user we provided when we created the MySQL instance.{HeatWave MySQL IP address}- The private IP address for our HeatWave MySQL instance.- Note that we must provide a port number when connecting over SSH. In this example, I used port
33060which will connect using the X-Protocol.
After running this command, MySQL Shell will be connected to the new HeatWave MySQL instance.

After we are connected to our HeatWave MySQl instance, we run the following command to create a new database schema for this demo.
\sql create schema wp_demo;
With the new schema completed, we can use \q to exit from MySQl Shell.
Prepping the Compute Instance
Now, we need to prepare our Compute instance to install WordPress. Using the private key we specified/created when we spun up the instance, connect over SSH using a command similar to the one below.
ssh ssh opc@{public IP address} -i {path to private key}
The {public IP address} is the public IP address for our Compute Instance, and the {path to private key} is the absolute path to the private key on our system.
If you have not connected to this instance before, you will be asked to verify if you want to connect and add the key fingerprint to the list oh known hosts. The screen may resemble the following image.

Updating the System
Whenever I spin up a new Compute instance, I like to ensure everything is up to date. For this demo, we can run the following command.
sudo yum update
This command may take a while to complete depending on the version of Linux you chose when you created the Compute instance.
Installing Apache
We can use Apache or Nginx with WordPress. I will use Apache for this demo because I am more familiar with it.
Apache can be installed by running the command:
sudo yum install -y httpd
To enable and stat the Apache HTTP Server, we use the command:
sudo systemctl enable httpd --now
Open Local Firewall Ports
Earlier, we set up ingress rules for ports 80 and 443 to allow web traffic into our public subnet. However, we must still open those ports in our Compute instance.
To open port 80 on our Compute instance, we run the following command:
sudo firewall-cmd --permanent --add-port=80/tcp
Opening port 443 can be accomplished by using this command:
sudo firewall-cmd --permanent --add-port=443/tcp
Once we have configured our rules for the local firewall, we need to reload them to start allowing traffic on those ports.
sudo firewall-cmd --reload
Installing PHP
To run a WordPress site using recent versions of WordPress, we need at least version 7.4 of PHP installed. Installing version 7.4 of PHP can be accomplished by running:
sudo yum install -y @php:7.4
Once PHP has been installed, we need to restart Apache. We do this using the command:
sudo systemctl restart httpd
We should check that the correct version of PHP was installed. The following command shows the installed version of PHP.
php -v
The output should resemble the text below.
PHP 7.4.33 (cli) (built: Oct 31 2022 10:36:05) ( NTS )
Copyright (c) The PHP Group
Zend Engine v3.4.0, Copyright (c) Zend Technologies
Testing
Before moving on, let’s create a simple PHP page to test that everything works as expected.
I will use Nano, but you can use any method to create a file.
sudo nano /var//www/html/test.php
Add the following text to the file and save the file.
<?php
phpinfo();
?>
Now, open a web browser and navigate to http://{Public Ip address of Compute instance}/test.php. If everything is set up correctly, you should see a page that resembles the image below.

If you are curious, take a look at the information that is available on the page.
Installing WordPress
If everything is working as expected, we can install WordPress.
Installing PHP Modules
We first need to install the PHP modules that WordPress will need. We install these modules using the following command.
sudo yum install -y php-mysqlnd php-zip php-gd php-mbstring php-xml php-json
When these modules are installed, we need to restart Apache.
sudo systemctl restart httpd
Download WordPress
We can download WordPress by using the following command.
curl -O https://wordpress.org/latest.tar.gz
After the download is complete, we extract the contents of latest.tar.gz to /var/www/html using the command below.
sudo tar zxf latest.tar.gz -C /var/www/html/ --strip 1
With the files extracted, we need to change their ownership using the following command.
sudo chown apache. -R /var/www/html/
Next, we need to create a directory to handle uploads and then adjust the ownership of that directory. Use the following commands to accomplish this task.
sudo mkdir /var/www/html/wp-content/uploads
sudo chown Apache:apache /var/www/html/wp-content/uploads
Lastly, we need to open up some permissions with selinux by running the commands below.
sudo chcon -t httpd_sys_rw_content_t /var/www/html -R
sudo setsebool -P httpd_can_network_connect 1
The first command will allow PHP to write to the site directory. We will need this when we run our setup below. The second command enables Apache to make network connections. This setting is necessary to allow PHP to connect to our database.
Run the Setup
To finish our installation, we need to configure our setup. Open a browser window and navigate to http://{Public Ip address of Compute instance}/wp-admin/setup-config.php.
You should see a page that looks like the image below.

Click the “Let’s go!” button.
On the next page, enter the information for the database connection. The “Database name” (1) is the schema we created above. In this example, we use wp_demo. The “username” (2) and “password” (3) are the username and password of the user we specified when we created the HeatWave MySQL instance. The “Database host” is the private Ip address of our HeatWave MySQL instance.

When you have completed the form, click the “Submit” button.
If everything is working as expected, we should see the following screen.

Now, click the “Run the Installation” button.
On the next page, we are asked for some information about the site. This information includes the “Site Title” (1), “username” (2), “password” (3) (you can accept the generated password or choose your own), and email address (4). When you have filled out the form, click the “Install WordPress” button (5).

We will now see the following page.
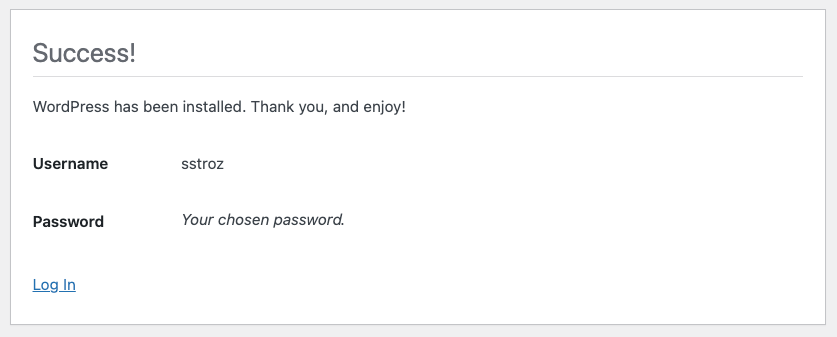
After clicking the “Log In” link and logging in using the username and password we just provided, we are brought to the main dashboard of the ‘Admin’ section. From here, we can add pages, update the theme, and do other tasks to manage a WordPress site.
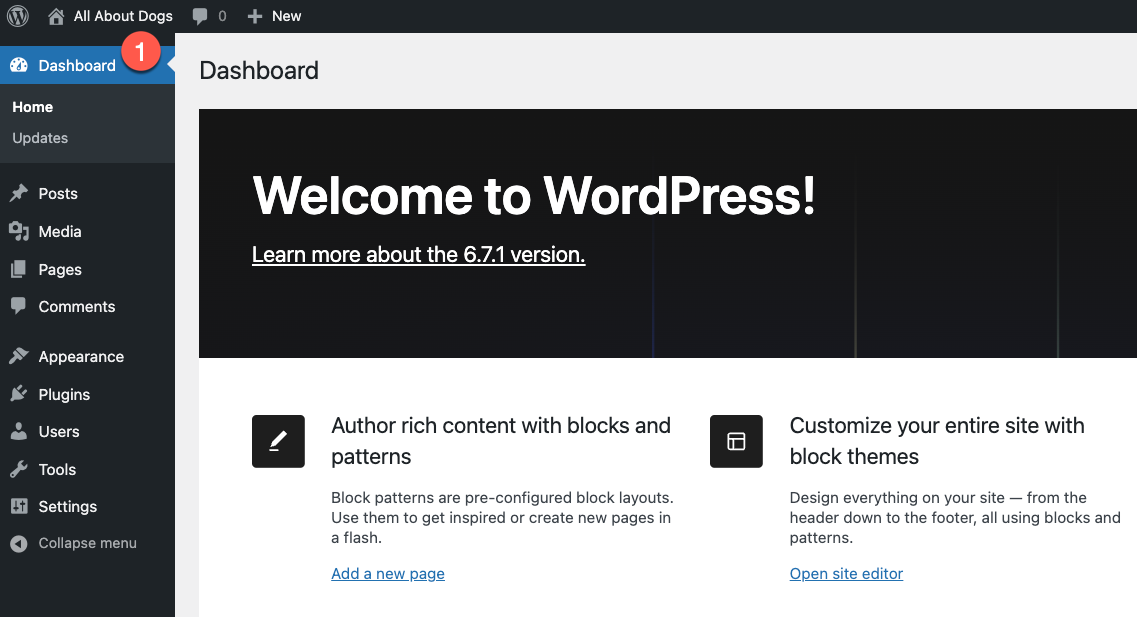
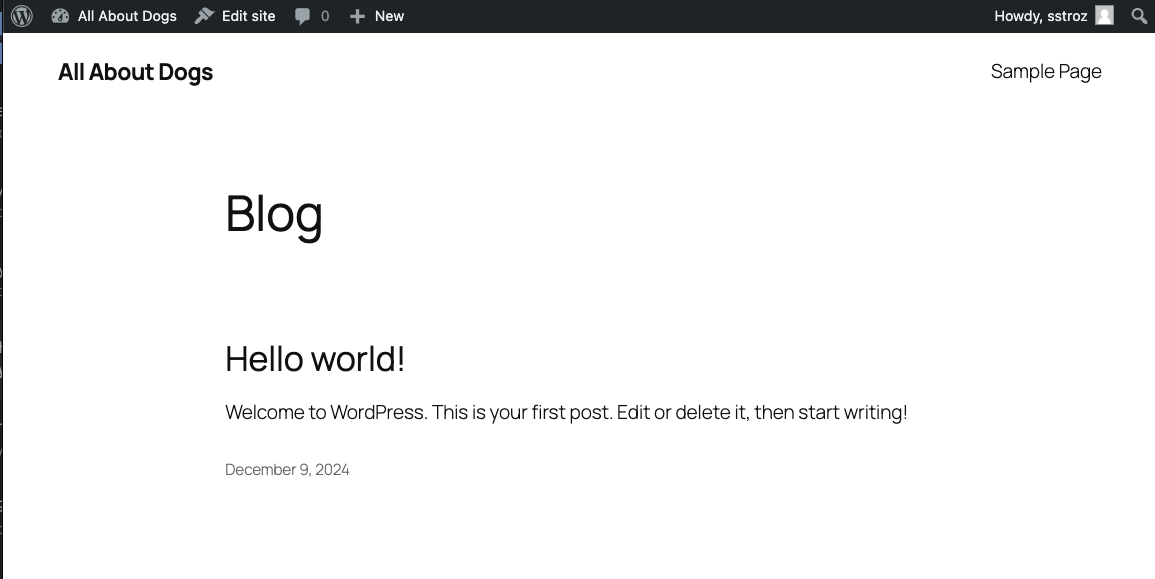
If we click on the “All About Dogs” link at the top of the page (1), we can see what the public-facing site looks like. The image below shows the default layout when a WordPress site is created.
Next Steps
The next steps for running the WordPress site are outside this post’s scope. They include, but are not limited to:
- Registering a domain name (if you do not already have one)
- Configuring Apache to use your domain name
- Get SSL certificates and configure Apache to use them.
Wrap Up
WordPress is one of the most popular content management systems (CMS)/blogging platforms on the Internet. By combining an Always Free Compute instance with an Always Free HeatWave MySQL instance, you can get a WordPress site up and running on an architecture you control without having to pay any hosting fees.
Photo by Lavi Perchik on Unsplash

